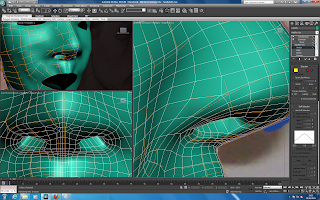
The next step is to correct to nose and create the nostrils. It is important I have a number of vertices surrounding the nose as the tip of the nose needs to stand out.
The first thing to do was to create some extra lines around the nose. This was done using the cut tool. Another trick for doing this was selecting the inside lines and holding shift and dragging them out. These is done where I deliberately left space for the nostrils when modelling the face.
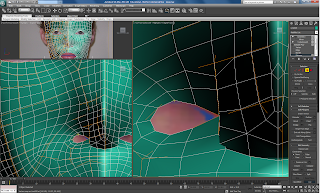
After welding these points together, it is important that you look at the nose in perspective view and try to get the nostril in position. Once this is done, use attach to create another poly in the gap.
After this is done, the new polygon can be extruded upwards. This creates a nice hold for the nostril. Using the perspective view again to check that it is positioned correctly, we have our nose!

The final thing to do is give a better shape to the nose. This is done in left view by dragging the vertices towards the tip of the nose to make it more rounded/less rounded depending on what needs to be done. Here is my final nose!
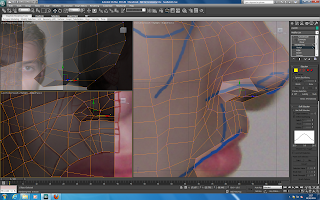
After this, we can use a similar method to do the lips. By pulling out the lines at the top and bottom of the lip (press alt x to make the model see through) we can position them to where they are on the image. It is vital that there are two sections to the lips. Once these have been positioned, the first line can be moved to add specific curving that is needed.

No comments:
Post a Comment