
Moving into 3ds max, a sphere is used as the basic shape. After shaping it so it is the correct width and rough length, it is time to start changing the vertices so it becomes head shaped. I also shrunk the number of sides to 24 as it will be awkward to work with too many. After this is done, it is time to convert the shape to an editable poly.

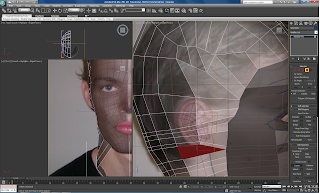
Using the spray selection tool, I was able to select a range of polys at once and delete them. In this case I removed most of the sphere (see red section). I will then be able to extend the polys to create the rest of the head. It is also important to select and delete the right hand side of the sphere and delete it, as the symmetry modifier will add the right hand side.

Next, it is time to remove some of the polys.To do this there are a couple of useful tools, rather than selecting every individual one and pressing backspace. After selecting every other line (see pic below) I pressed ring and the adjacent lines were all selected too.

After this, hitting the collapse button removes the selected lines and gives an easier platform for modelling.

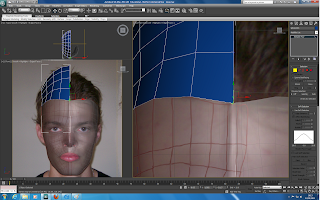
Using the snaps toggle, soft selection and weld, it is possible to connect the vertices to the face. It is a simple case of dragging them into position and then welding.
After reshaping some of the vertices it was time to extend the polys down to create the rest of the head. TO do this I selected the lines I wished to extend. Holding shift, it is possible to create new polys very easily just by dragging. Another useful tool is the create tool and the cut tool. The create tool enables you to create new polys by connecting the four vertices together. The cut tool enables you to add new vertices wherever you want. It was a tough procedure I found creating the head, trying to have no triangles or five sided shapes resulted in the being a lot of vertices. Hopefully this won't cause too many problems, but it will mean I need to take care later on when changing little parts of the face.
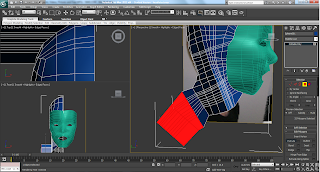
After extending the polys down in the left view I was able to extrude out the shoulder. This had to be done in perspective view, where as everything else so far has been done in the left view.
Here is the result. It's ok for the moment, I will spend time tweaking things later on.

No comments:
Post a Comment