
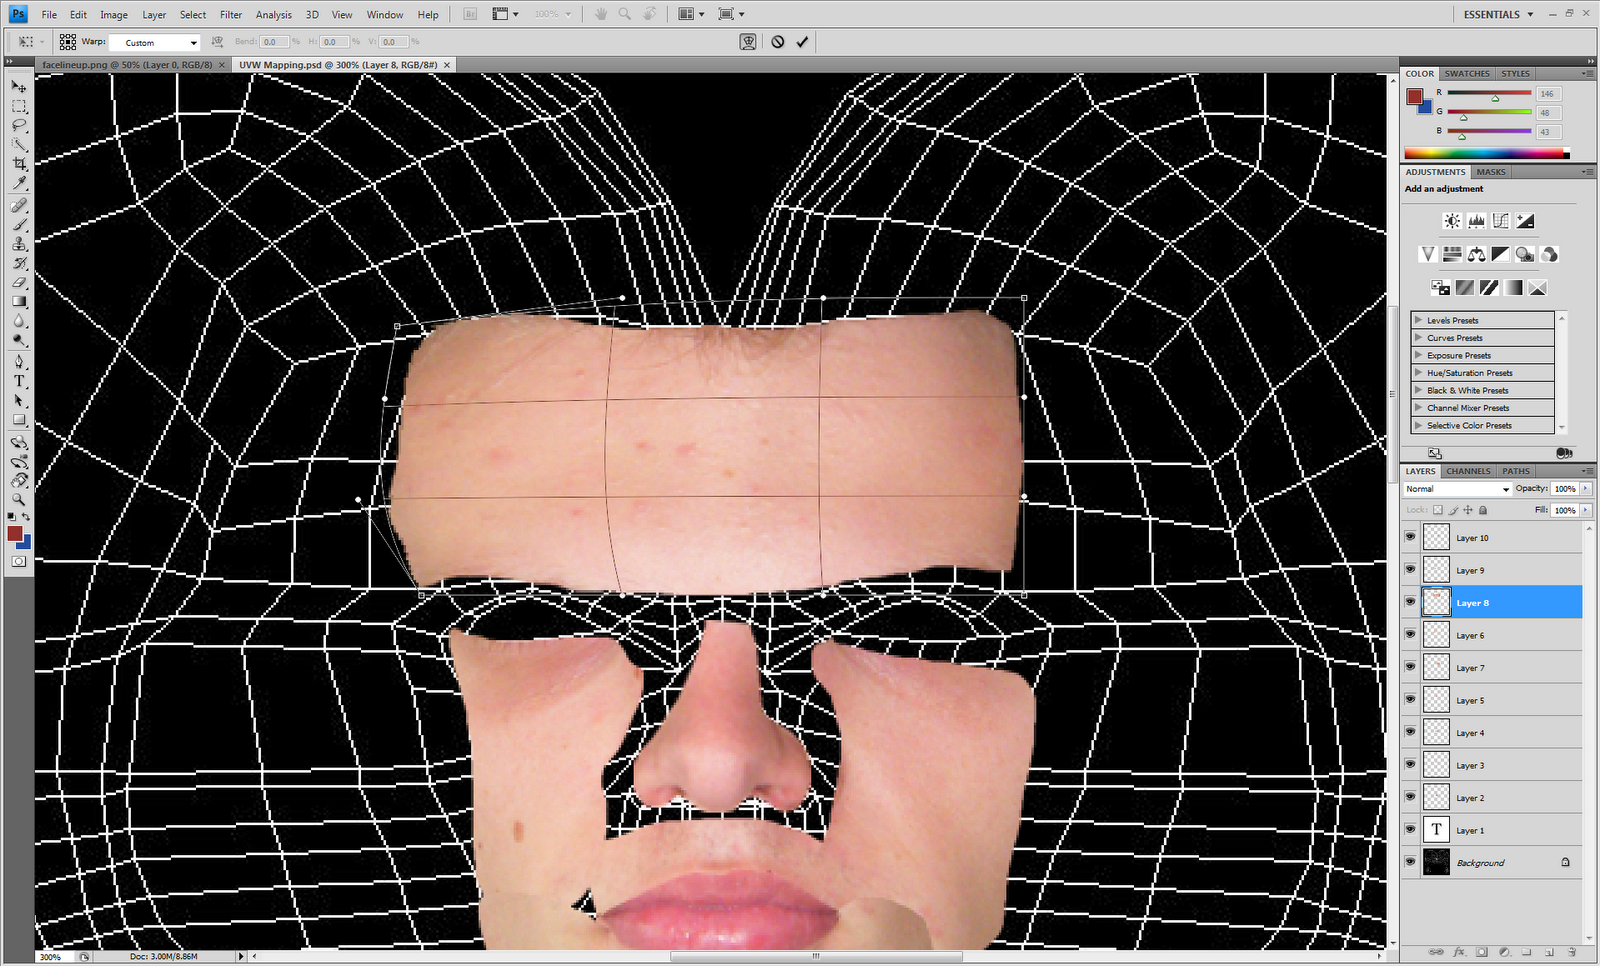
Once it is in its rough position I can adjuct the layer by stretching it and changing the size. One useful tool is the warp tool (edit, transform, warp). This enables the different parts of the image to be manipulated.
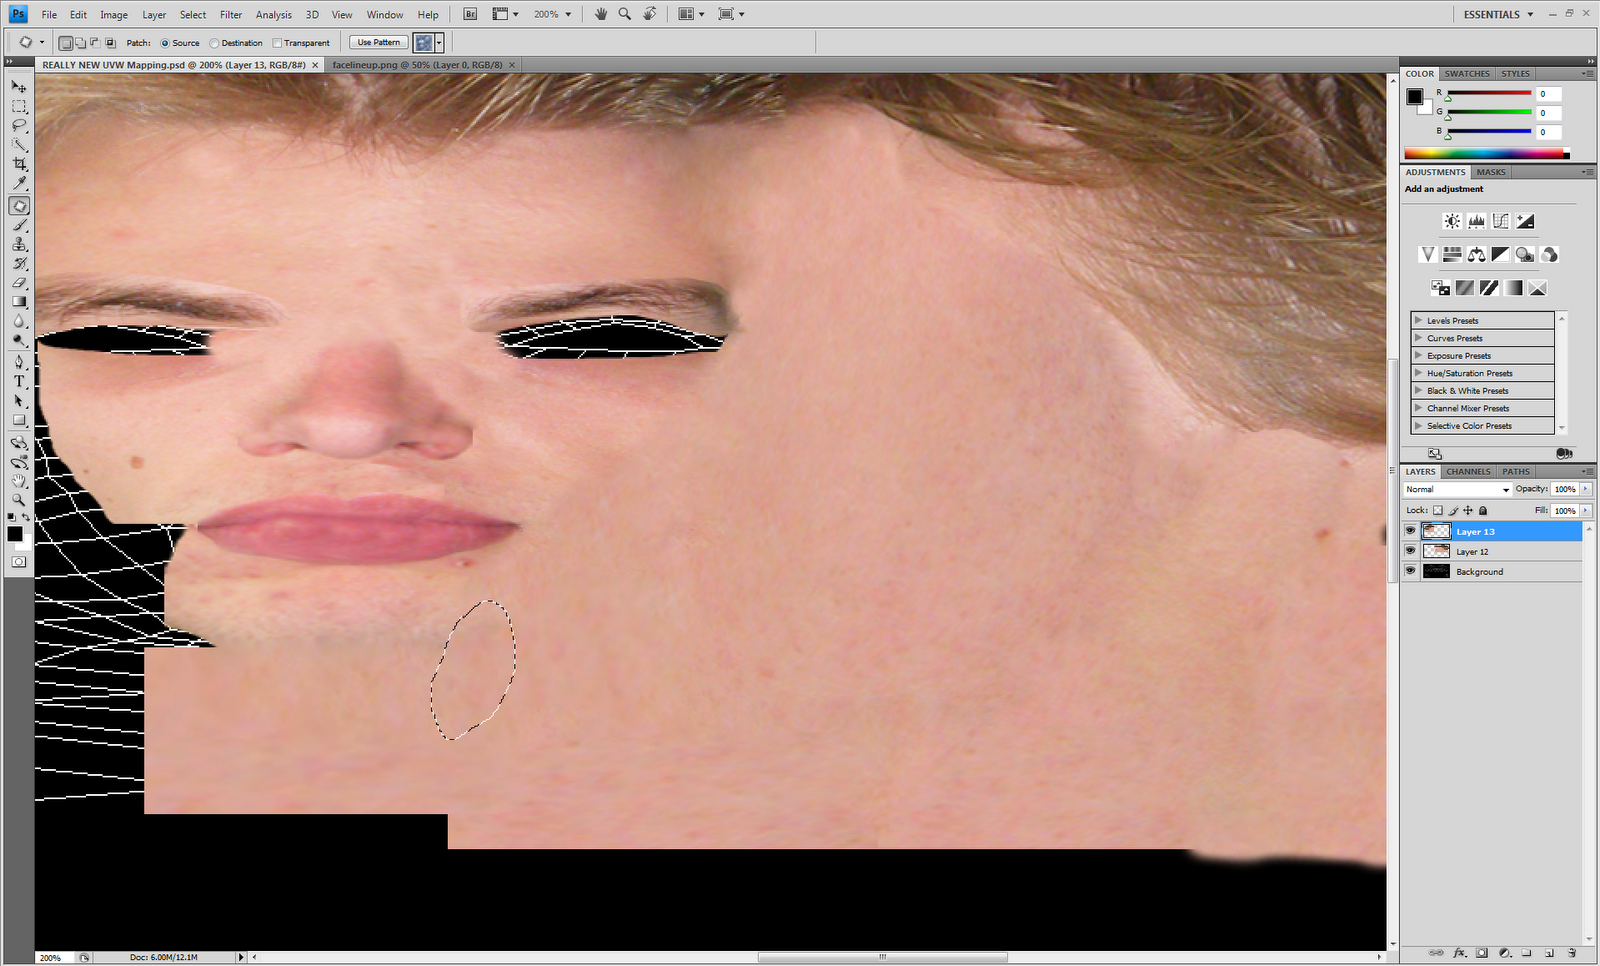
Another useful tool is the clone stomp tool. This enables parts of the image to be painted in different areas. Using alt to select the part of the image wished to be painted it's a case of clicking and dragging. This is very handy for filling in gaps.

The patch tool is also very helpful. This is used to blend in parts of the image to eachother. Particularly with this, the skin colours have slightly different colours and textures. Using patch means that the colours and textures are blended together better. To see the results compare the picture below to the picture above.
To do the texture on the ear I took part of the face and simply pasted it over the map of the ear. It doesn't matter that it goes over the edges of the UVW map because anything outside won't appear on the model.

After all the gaps have been filled in and all the skin pasted on the UVW map, refreshing the materials in 3ds max enables us to see the skin.

No comments:
Post a Comment