Tuesday 22 November 2011

Local Books

I have put the images of the front covers onto the books I made a few weeks ago. I am pleased with the results. To do this I used unwrap UVW again, as well as a new trick within material editor.

To start with I copied a book from the bookshelf and dragged it out so I could see it. I then created a third material ID and selected the front cover (ID1 is the covers of the book, ID2 is the pages and ID3 is now the front cover). I went into material editor and copied the previous book materials into a new slot. I then added the bitmap of the new book into ID3.

I used an unwrap uvw modifier to position the cover correctly. I used the planar gizzmo and aligned it along the x axis. After moving the vertices around, I had positioned the cover correctly.


Next I went into the material editor and went to change the colour of ID1. To do this I used the screen colour select tool within material editor. I have not used this before and wasn't sure how successful it would be. It turned out to be reliable which was very useful.


I did this for the remaining 3 books. This is my final result.


Monday 21 November 2011

Finchingfield Local Authors

I conducted some research into local authors from Finchingfield. The website states that the Guildhall will be used to show works by the local authors. Here is a list of novelists that I found and their best known work.

Dodie Smith

Novels

I Capture the Castle (1949)


The Hundred and One Dalmatians (1956)


Plays

Autumn Crocus (1931)
Call it a Day (1935)


Norman Lewis
Novels

The Honoured Society - The Mafia Conspiracy Observed (1964)


Naples '44 (1978)


http://www.ebay.co.uk/itm/Capture-Castle-Dodie-Smith-1949-/200645678517


http://www.goodreads.com/review/show/161375753


http://ecx.images-amazon.com/images/I/412Ap861t-L._SL500_AA300_.jpg


http://berkmanbooks.blogspot.com/2011_03_24_archive.html

Friday 18 November 2011

Fireplace

We realised that the library will have a fireplace in it.

I started with a box as usual. After using the swift loop tool to add in extra lines and vertices I was able to extrude out the base and extrude in the fire part of the model.


Inside the fireplace itself I used the create tool. This enabled me to create an angled panel at the top of the indent.


Next it was time to do the materials. I used one of the images that we had from our trip to finchingfield of a brick texture (see below)


I put this onto the model but it was cramped in certain places. To solve this I used an unwrap UVW modifier. I have only used this once before in my head model so it was still a relatively new modifier for me to use. This enabled me to select certain parts of the model and change the map so the material fitted better. When selecting the polys needed I chose the planar widget then select align to whichever direction the poly was facing.


I used a multi\sub object material and chose three material IDs. One for the main brickwork, one for the inside of the fireplace and another brick image for the floor of the fireplace. The final result is as folows.

Bits and Pieces


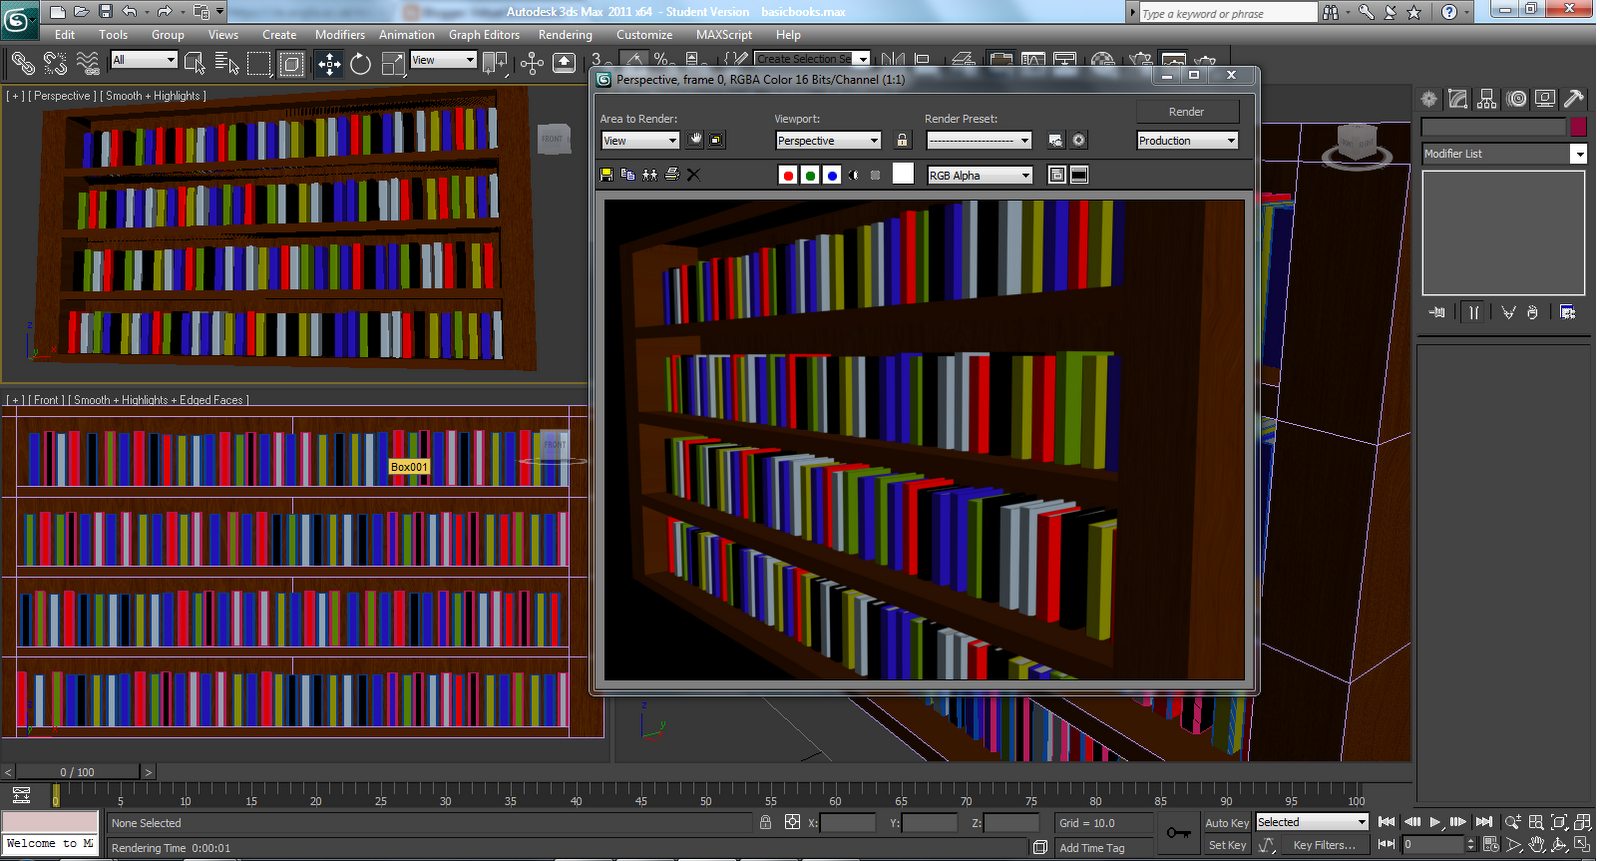
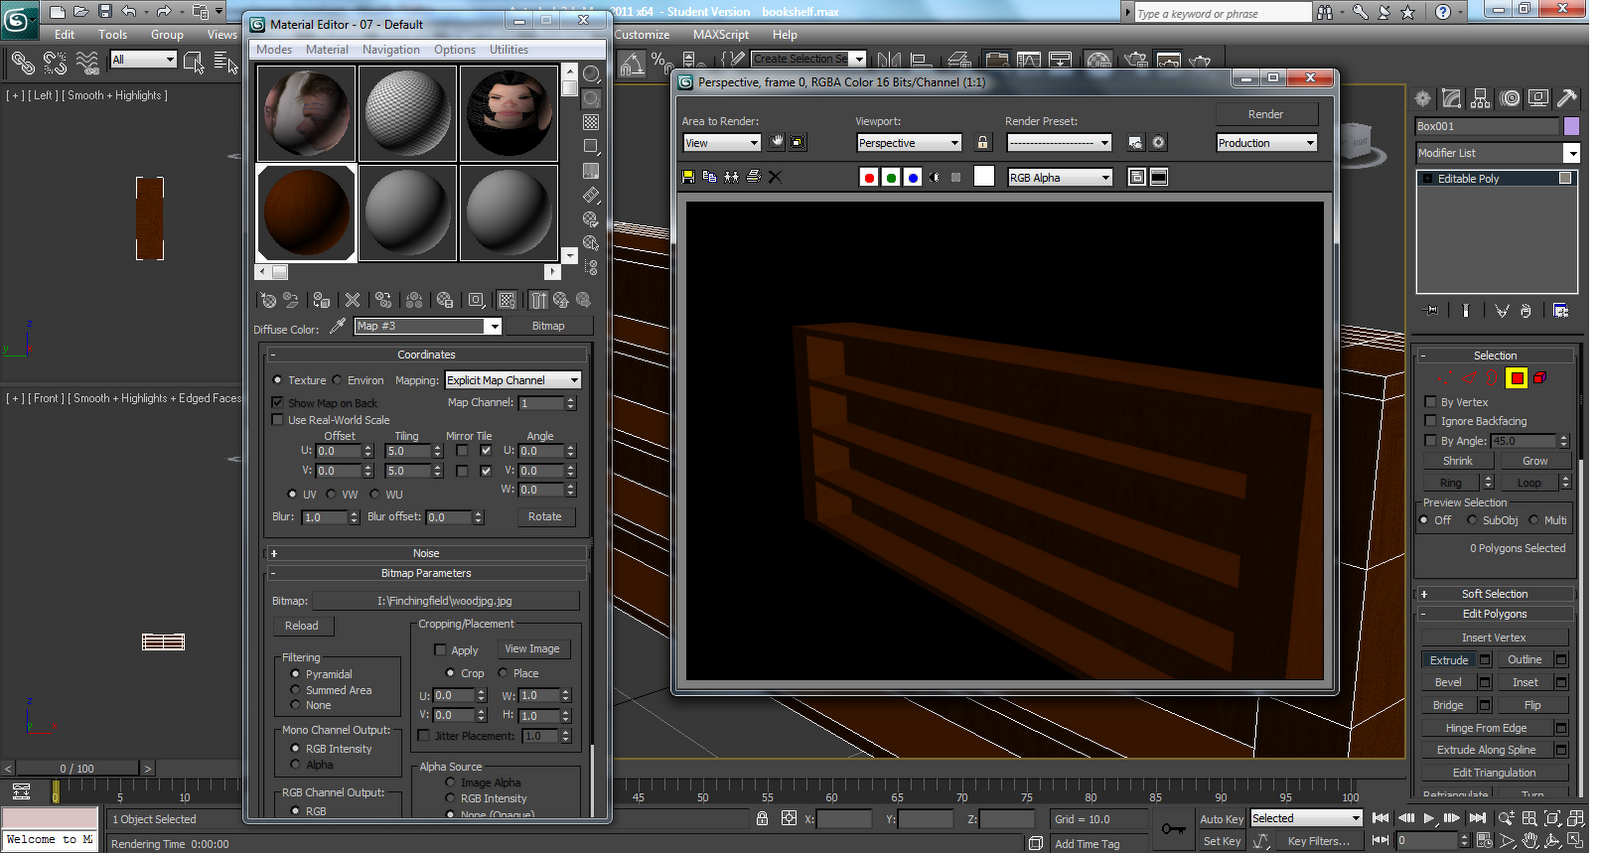
This week we've been working on creating any little bits that were missing for the model of the Guildhall. These were all relatively small, but not insignificant enough to be left out altogether. I created a few items including a toaster, a mug, a light switch and a plug socket. These can all be duplicated around the building.

While creating these objects I started to use the object isolation mode (which remarkably I haven't used before!)

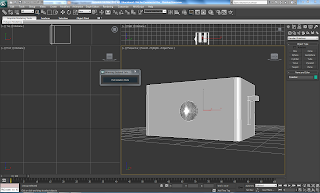
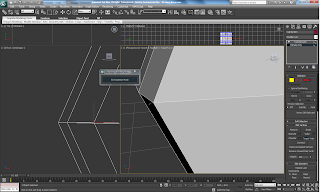
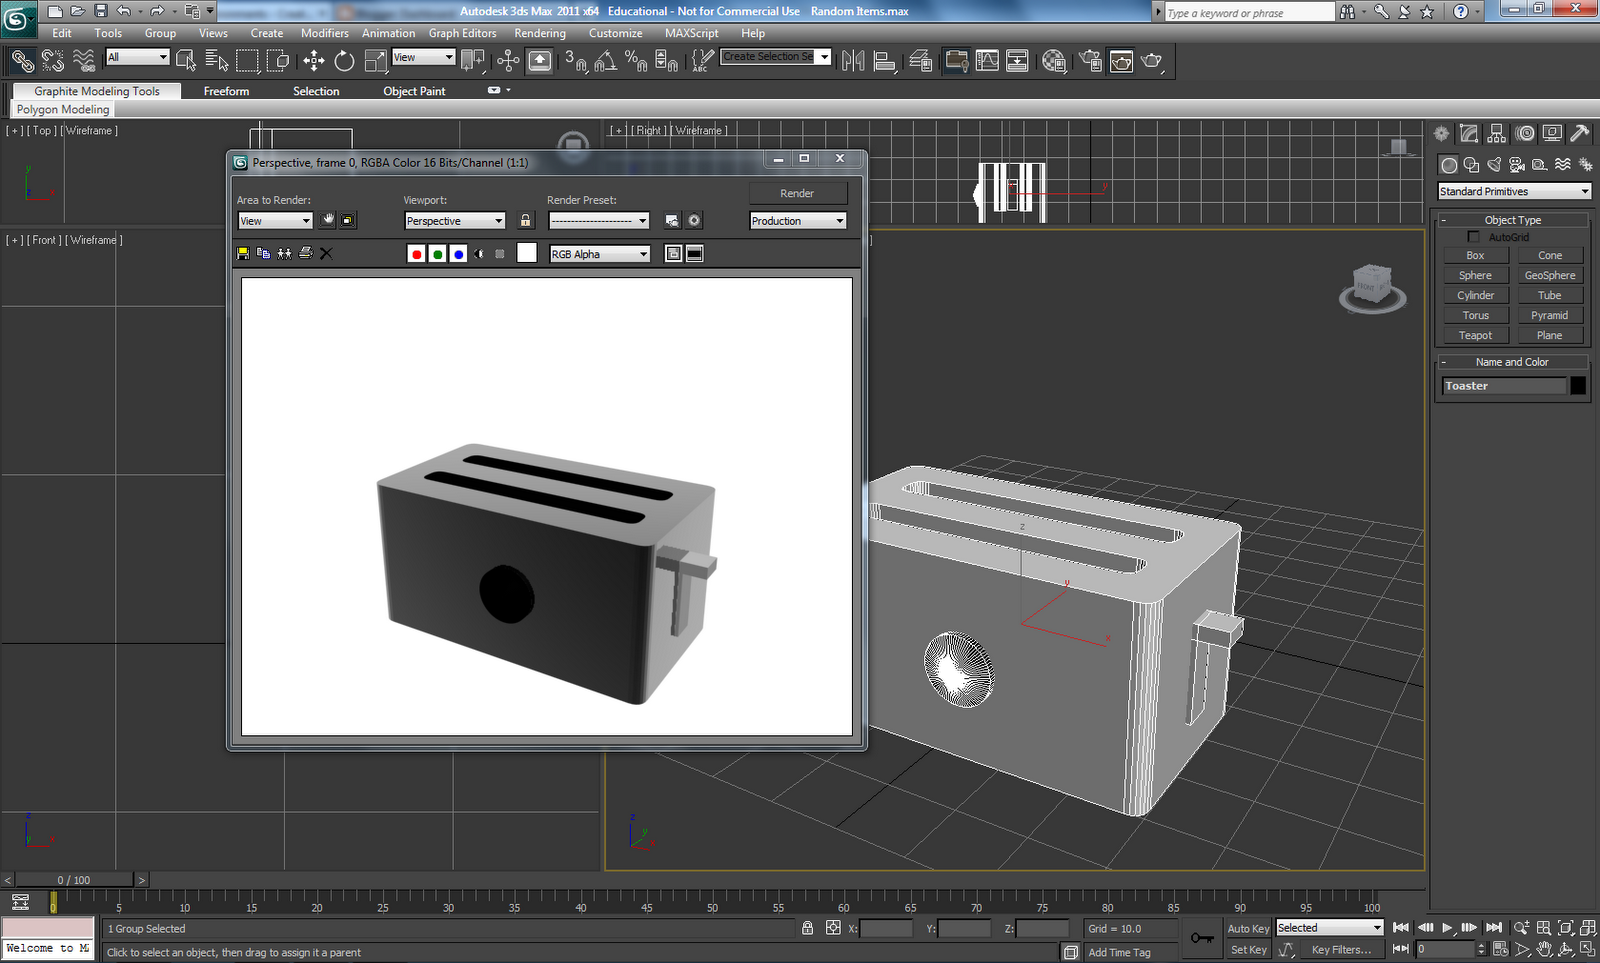
Toaster: To start, I created a box. After converting to editable poly I chamfered the four edges like I did with the pc screen last week.


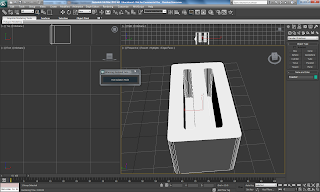
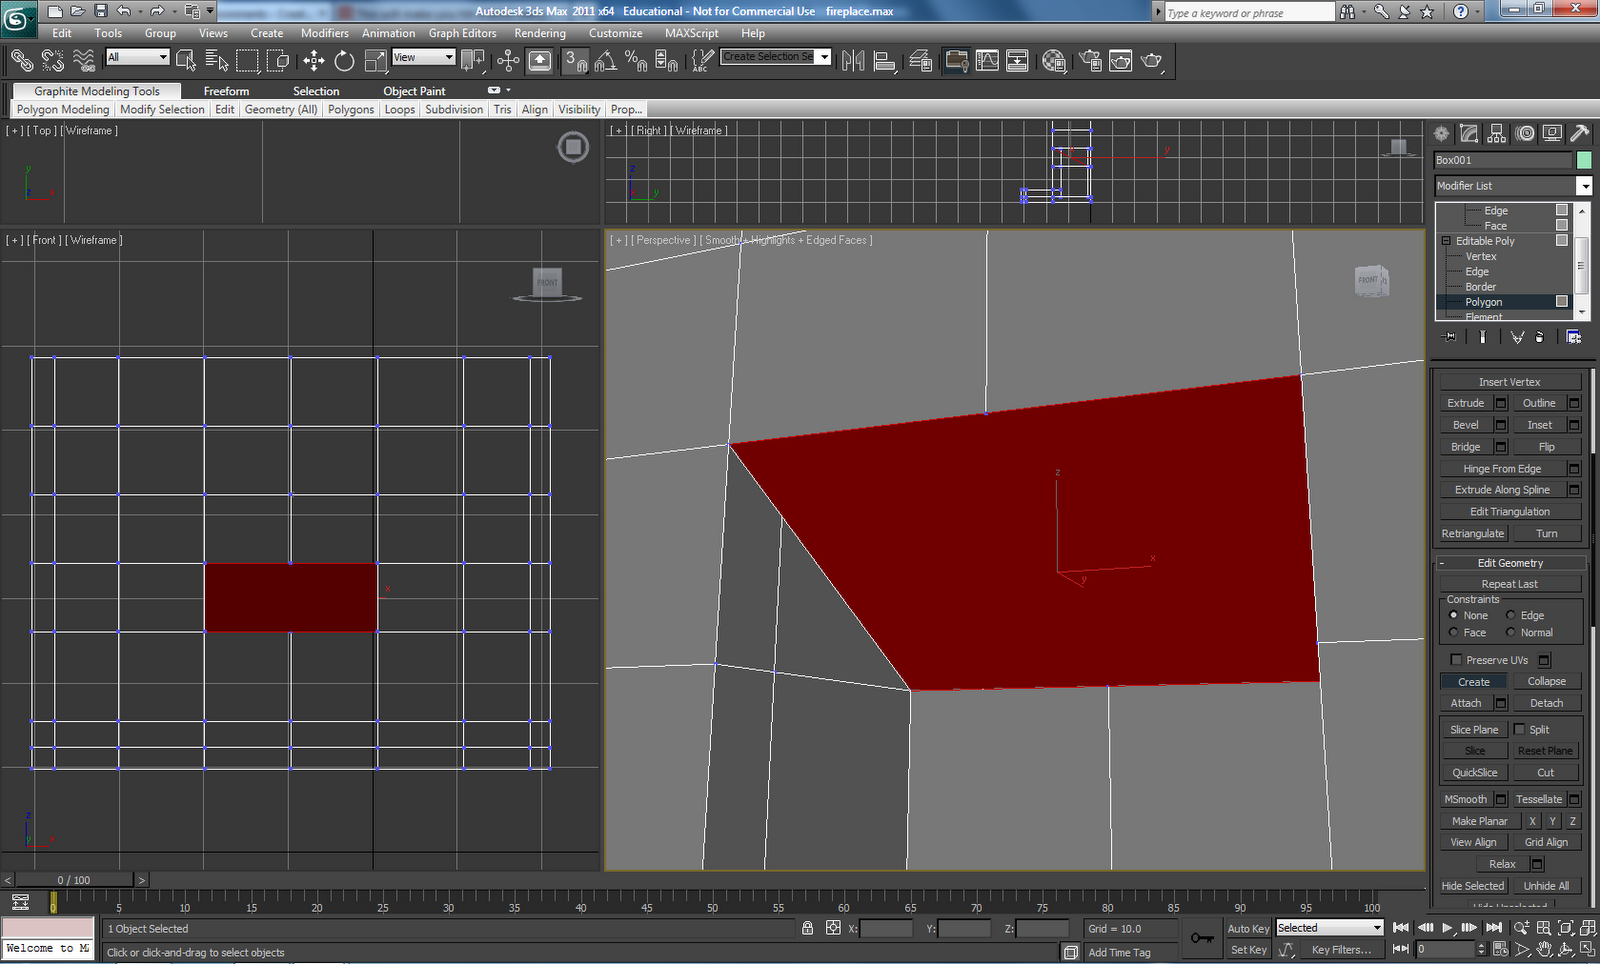
The key to the toaster was the slots in the top for the toast. To do this I used proboolean. After creating two boxes that will provide the cut out for the slots I started picking my objects. I was left with two slots in the top of the toaster.


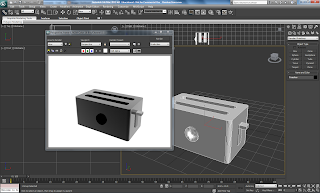
After this I created the little dial on the front, using a cylinder and bevel. This resulted in a cone like shape that looks like a dial.


The next thing to do was to create a lever on the side. To do this I created a simple box and extruded out the back. I then extruded out the new created poly as well. After selecting a shiny raytrace material the toaster was complete.


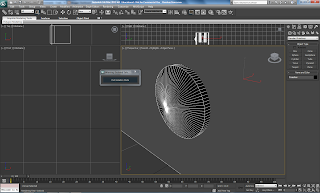
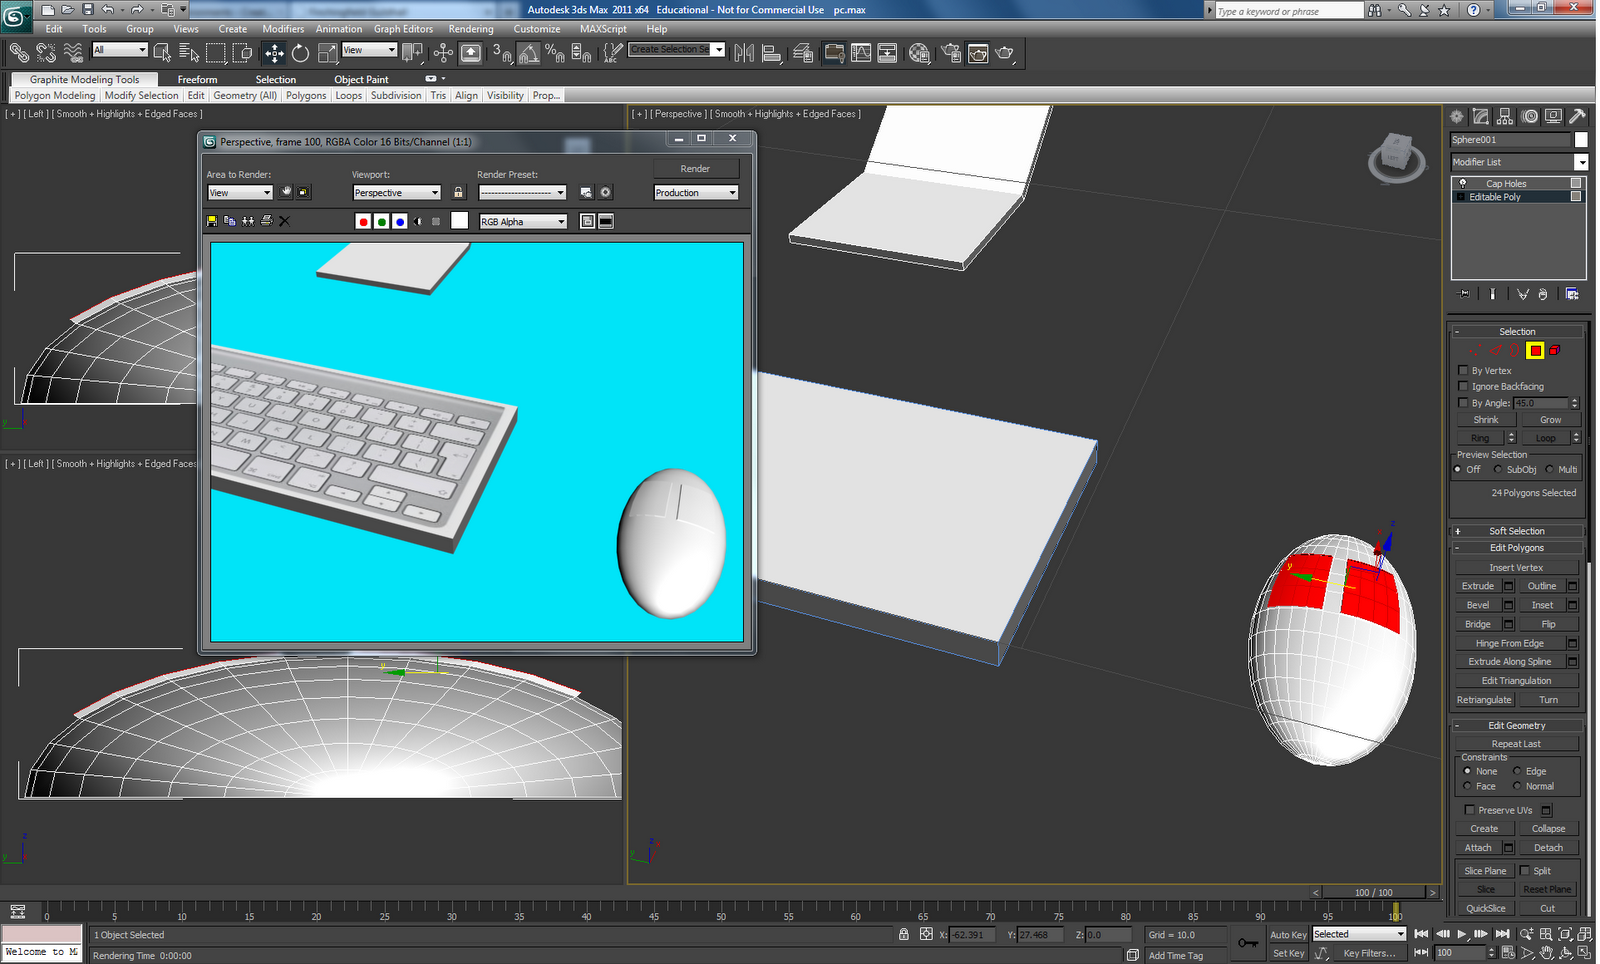
Next up was a cup. This was very simple. I created a cylinder firstly and used inset to create a smaller poly in the middle. Next I extruded this poly inwards towards the bottom of the cup. To create the handle I extruded out three panels from the side. After adjusting the vertices I was able to extrude again downwards.


I was then left with vertices that needed to be connected together. I then used another tool that I haven't used before, target weld. This is far better than weld, you are able to select the two vertices you want to connect and max does it for you automatically.


After adding a turbosmooth modifier and a white material, the cup was complete.


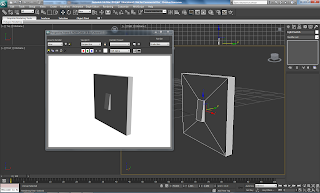
My next model was a light switch. To do this I firstly created a box. I then used inset to create a smaller poly in the middle. This would form the switch. After extruding this out slightly, I used the detach tool. This disconnects the vertices and means the poly becomes a seperate object, I then used rotate to put the switch at an off position, and reconnected it using attach.


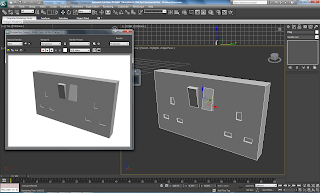
The final model I created was a plug socket. To do this I used the same method as before with the light switch. I instead created two on and off switches. I then created three small boxes and arranged them like plug pins. After duplicating these to the other side of the plug I chose proboolean and selected all of the boxes. I was then left with my plug socket.

Friday 11 November 2011

PC


Next, I have created a computer for the renovated Guildhall. We'll need to start animating soon so we've decided that we'll only model important things from now on.

I firstly started off with a box. I used inset to create a new poly within the box. I did this on both sides of the screen as chamfer will mess up if the shape is not consistent on both sides. The next thing to do was to use the cut tool to make a rectangle in each corner instead of the single line that inset had produced.


Using cut I filled out each other corners creating rectangles there, then deleted the lines that inset had put in. Using cut I filled out each other corners creating rectangles there, then deleted the lines that inset had put in.


The next thing I did was to chamfer the corners of the screen. This is where it was important that I created the rectangles earlier on as chamfer does not work without this. After i'd rounded the corners of the screen I set everything to be ID1 whilst just the screen panel to be ID2. Using a new multi object layer I set ID2 to be a jpeg of the guildhall, this is a sensible thing to put on the screen.

Next up I created the stand for the screen. I started off with a separate panel and rotated it into the back of the screen. After extruding out the last polygon I was ready to chamfer again.


I extruded out two panels resulting in them being locked at a right angle. Selecting the line in the middle I again used chamfer. I increased the number of sides to get a smoothed off effect for the stand.


To make the keyboard I created a simple box in the shape of a keyboard. I selected the face and chose ID1 and the rest of the keyboard as ID2. I then put a jpeg of a keyboard onto the face. After some resizing they keyboard was complete.

Next was the mouse. To do this I squashed a sphere and removed the lower half of it. I then used a modifier called cap holes, which I have not used before. This plugged the gap at the bottom of the mouse and put in an extra polygon. I could have done this manually using the create tool, but cap holes was quicker.


I wanted to add a bit of detail to the mouse, so I chose just to add the buttons. To do this I chose the polygons I wanted to be the buttons and used bevel. This tool is very useful when you want to make a ridge.


Here is the result of the rendered mouse, the bevel modifier has worked nicely.


To make the tower for the pc I created a box. I used inset to make the middle part different to the outside. After this I used the same technique as on the monitor, using the cut tool to create the quads in the corners, then using chamfer.


Here is the result of the final rendered computer

Skin texturing

The next step for creating my head is to paste the skin onto the uvw map. To do this I will use my own skin from my face picture. There are afew tools in photoshop that help me to make this process easier. The method is to take pieces of skin from the original picture of my face and paste it onto the uvw map that I produced before. I use the lassoo tool to select an area and then paste it into the UVW map jpeg.


Once it is in its rough position I can adjuct the layer by stretching it and changing the size. One useful tool is the warp tool (edit, transform, warp). This enables the different parts of the image to be manipulated.


Another useful tool is the clone stomp tool. This enables parts of the image to be painted in different areas. Using alt to select the part of the image wished to be painted it's a case of clicking and dragging. This is very handy for filling in gaps.


The patch tool is also very helpful. This is used to blend in parts of the image to eachother. Particularly with this, the skin colours have slightly different colours and textures. Using patch means that the colours and textures are blended together better. To see the results compare the picture below to the picture above.


To do the texture on the ear I took part of the face and simply pasted it over the map of the ear. It doesn't matter that it goes over the edges of the UVW map because anything outside won't appear on the model.


After all the gaps have been filled in and all the skin pasted on the UVW map, refreshing the materials in 3ds max enables us to see the skin.

Monday 7 November 2011

Books

It is time to create some books for the bookshelf.

To do this I start off with a simple box. After converting to an editable poly I select the three sides that will be paper. After selecting the bevel tool and bringing up the options menu, it is important to switch group to local normal. Then I bevel the book in slightly creating an indent in the model. This starts to create the look of the pages.


The next step is to extrude in the bevelled polys. This helps to make the shape complete. Again it is important that local normal is selected on the extrude box, otherwise the pages will go through the book's spine.


The next thing I have chosen to do is chamfer the edges of the spine. This adds a nice curve that makes the book look more real and less rigid.


Once this is done, the only thing left to do is texture the books. This will be done using simple materials for the most part as the books will not be a fundamental part of the scene. If one or two books are to be seen in greater detail then we can use bitmap texturing to give them more detail. To give the books separate materials, different polygons will be assigned different IDs. In this case, the cover and spine will be ID 1 and the pages ID 2.


I found a paper texture online that I have used for the pages. For the moment I have just set default colours in the diffuse box as the cover but this can be changed later on to match in with the room.


I started to assemble the books onto the book shelf. First I resized and angled them onto the shelf. Then it was a case of copying the books over and over again to fill up the shelves. I also copied the materials a number of times and changed the diffuse colour. This will give a variety of different books on the shelf. The two books I made at the start were slightly different in height as well, so this helps add to the variety.


After more copying and pasting and mixing up some of the materials to avoid some repeating patterns, we are left with the final book shelf!

Book Shelf


My first model will be a book shelf for the library. The blueprints show the size of the library and it is quite a big room. This gives me two options, either make multiple small book cases, or a few long ones. It really doesn't matter because it is just a case of resizing them to fit in the room.

To start making the bookcase I started with a box. After moving the rows of vertices near to the edge I extruded out the polygons to give some depth to the model. Extruding like so creates the sides of the bookshelf.


Next step is to create the shelves. Selecting polygon mode I chose the create button. After putting on snaps toggle I was able to select the vertices that will form the shelves. There are four shelves along with the top of the unit.


The next step was to give the shelves some depth. To do this I used extrude again. I also selected all of the polys on the top of the model and extruded them to make the top look more realistic.


After adding some depth it was time to put on a wood material. For the moment I have just put on anything realistic. This is likely to be changed nearer the end of the project because we will want to ensure all the materials match eachother. For the moment, I chose a wooden material from google images and uploaded it into a bitmap material.


Now it's time to create some books!

Thursday 3 November 2011

Google Earth


One of the ideas we had for the animation was to zoom into the Guildhall from space using Google Earth. I gave this a try using free screen capture software. The results will probably look fairly crummy on here but I'll upload anyway!


Another interesting feature that is new on Google Earth is the ability to see images from the past. For Finchingfield it is possible to see two images, one from 2009 and one from 2000.

Image from 2009. Clear quality.


Image from 2000. Harder to see as image not as clear. The perspective is slightly different as the church tower seems to lean towards the bottom of the pic. There is no swimming pool to the right either.